Class Registration Create
Parks & Rec > Class Registration > Create
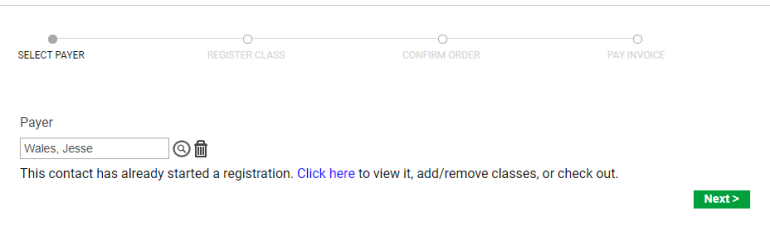
The Class Registration Create page identifies the registrant (payer). Click the Search button to select a payer name or manually enter the name. When completing the Payer field, you may enter the name in the [First Name Last Name] or [Last Name, First Name] format. After you type at least two characters of the name, the program provides a list of potential matches from which you may select a payer:
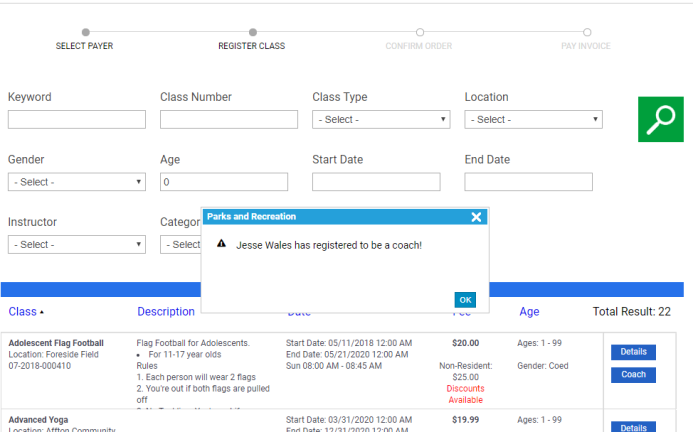
When you click Next, the Class Registration Create page provides the class search criteria:

If a class offers discounts, “Discounts Available” displays in the Fee column. Hovering over the message displays a list of the discounts available:
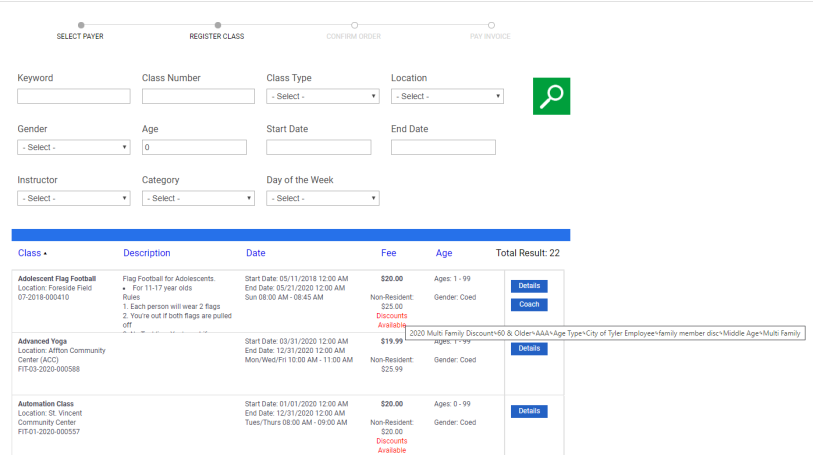
Note: The best available discount is applied automatically to a registrant’s fee. Existing family class and membership registrations are considered in determining whether a multi-family discount is eligible during a registration.
Once you have identified the class, click Details to view the Summary page and complete the registration by verifying the registrant and selecting applicable add-on items. Available discounts are listed on this page, also. For portal users, the discounts link to a pop-up that shows the dollar amount or percentage of each one or, in the case of a multi-family discount, a description of how the discount will be applied.
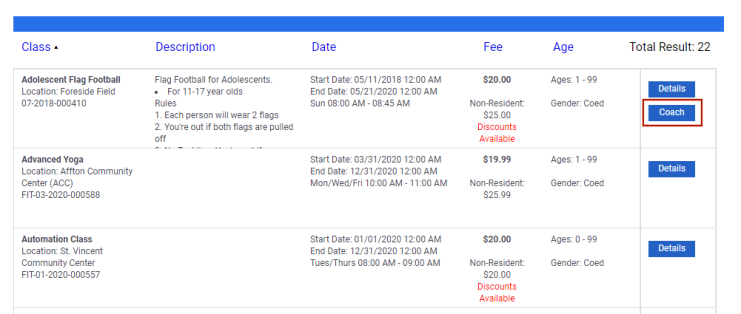
A Coach button is visible for any classes with a Class Type Format equal to League Individuals in System Settings:
Clicking this button opens the Volunteer as Coach dialog for the corresponding class:
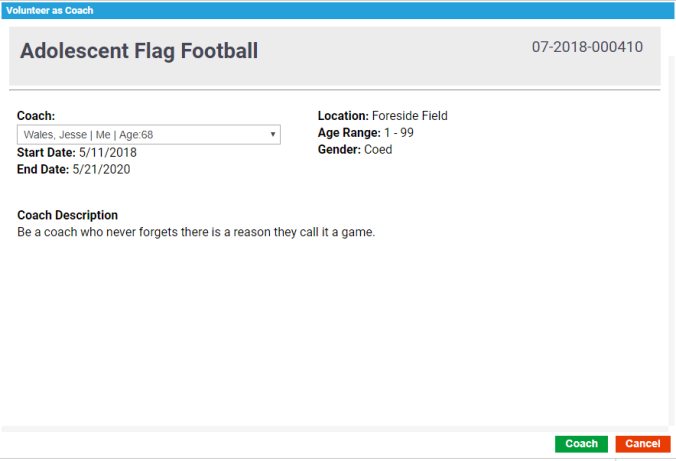
If a Coach Description was entered on the Class Details page, it displays here.
A list of family contacts associated with the payer will appear in the Coach drop-down. Make sure the coach selected is at least 18 years old and click the Coach button. A pop-up opens to confirm the volunteer coaching assignment:
If your organization uses the registration disclaimer option, the Summary page includes an acknowledge terms check box, along with a link to the terms. You must select the check box to verify the registrant's acknowledgment of the disclaimer.
Also, if the Allow Special Request setting has been enabled in System Settings, a Special Request field is available during the registration process for classes with a Class Type Format of League Individuals:

A special request made here is viewable on the player's card on the Team Builder page, making it easy to place the player on the appropriate team.
The Add New Dependent link on the Summary page lets you add a dependent for the selected contact. When you select Add New Dependent, the program provides the Contact Detail pages, then returns you to the Summary page with the dependent available for selection from the Registrants list.
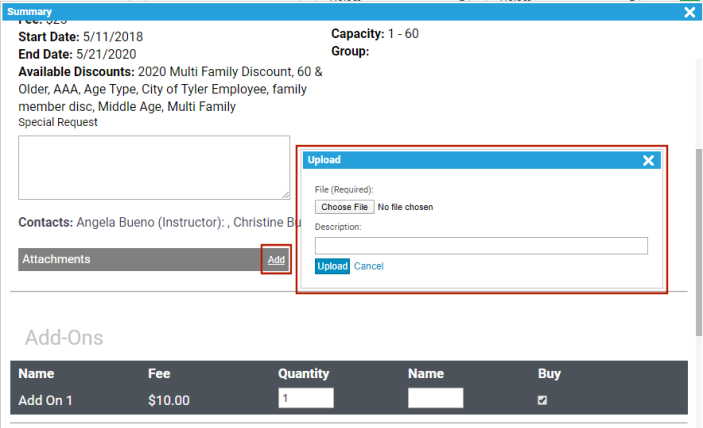
The Summary page also lists available discounts.
Use the Attachments option to upload a document, such as a registration form, to the registrant’s record:
If a selected registrant already is registered in the selected class, the program displays the “The registrant is in class” message in the summary information.
When you click Register, the program displays a confirmation box. Click Continue Shopping to complete additional registrations, or click Checkout to complete the current registration.
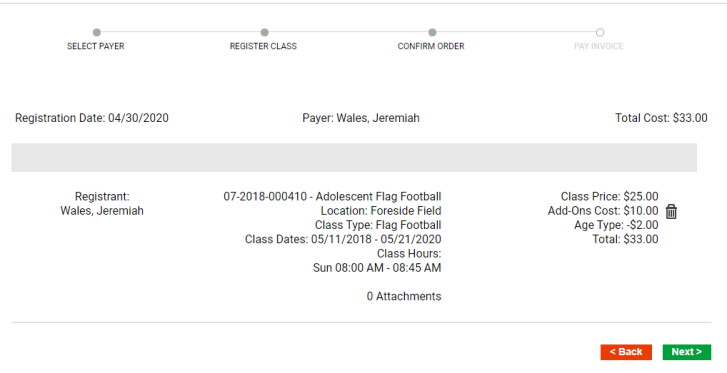
When you click Checkout, the program displays a CONFIRM ORDER page:
If all the details are correct, click Next to continue to the Payment page, where you may specify the Payment Method and select Pay Now or Pay Later.
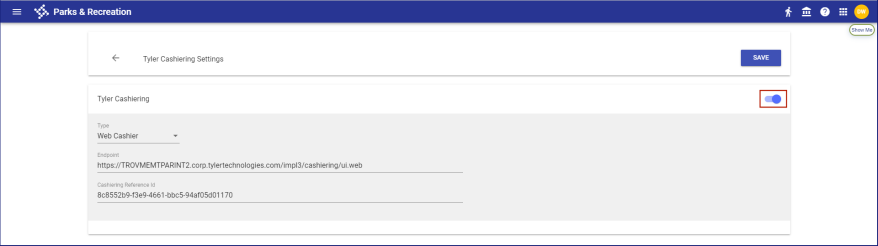
Note: If Cashiering is enabled in Integration Settings and cart fees have been applied to all payment methods in Cart Fees setup, the Payment Method drop-down is hidden.
If account credit is a valid payment method for the class type, the Payment Method drop-down includes the Account Credit option. In this case, if the payer has an account credit available, the credit may be selected as a payment method.
If a discount has been applied, the amount is shown as a subtraction in the Order Summary section:
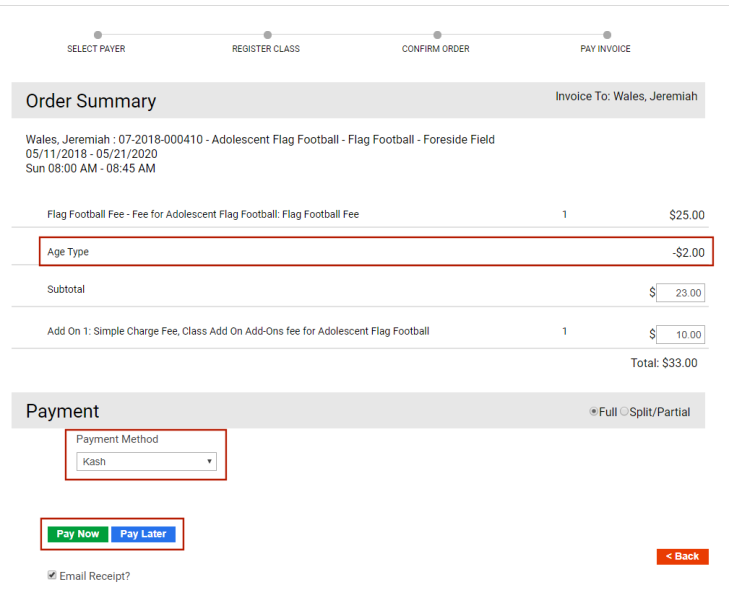
Note: On this page, an administrator may modify fees associated with the class registration prior to payment.
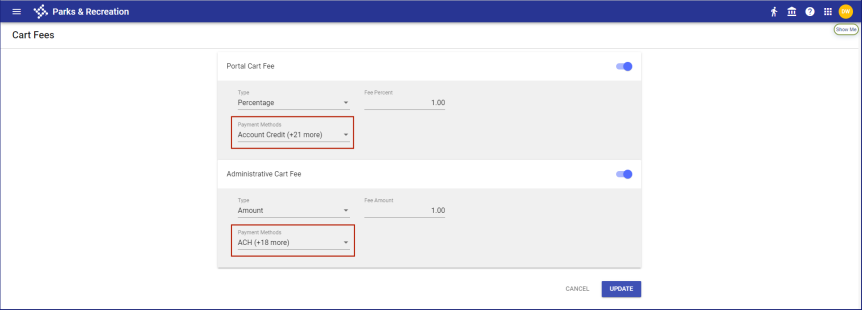
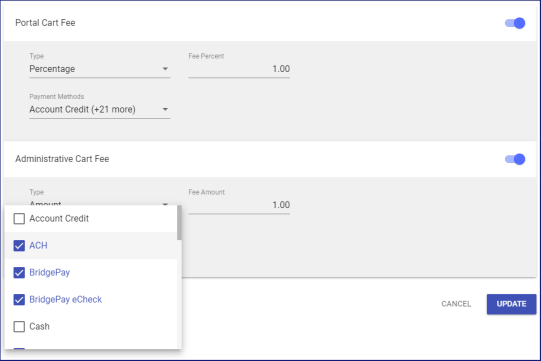
To let you apply cart fees to selected payment methods, the portal and administrative cards on the Cart Fees page in Cashier Setup (Administration > Cashier Setup > Cart Fees) provide a Payment Methods multi-select drop-down:
When Cashiering is ![]() disabled in Integration Settings, based on the Payment Method selected during checkout, the cart fee displays as a line item on the Order Summary and Payment page:
disabled in Integration Settings, based on the Payment Method selected during checkout, the cart fee displays as a line item on the Order Summary and Payment page:

Order Summary and Payment
If cart fees have been applied to all payment methods, the cart fee displays automatically on the Order Summary and Payment page, regardless of the payment method selected.
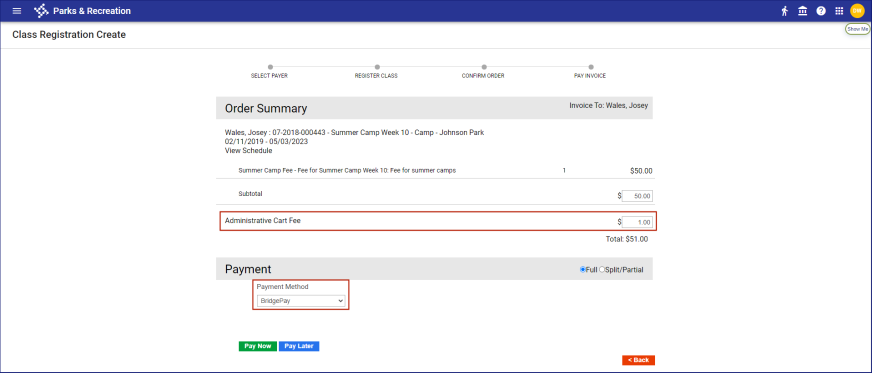
When Cashiering is ![]() enabled in Integration Settings and cart fees have been applied to all payment methods, the cart fee line item displays automatically on the Order Summary and Payment page, and the Payment Method drop-down is hidden:
enabled in Integration Settings and cart fees have been applied to all payment methods, the cart fee line item displays automatically on the Order Summary and Payment page, and the Payment Method drop-down is hidden:
Order Summary and Payment

When Cashiering is enabled and cart fees have not been applied to all payment methods, Payment Method provides a multi-select drop-down:
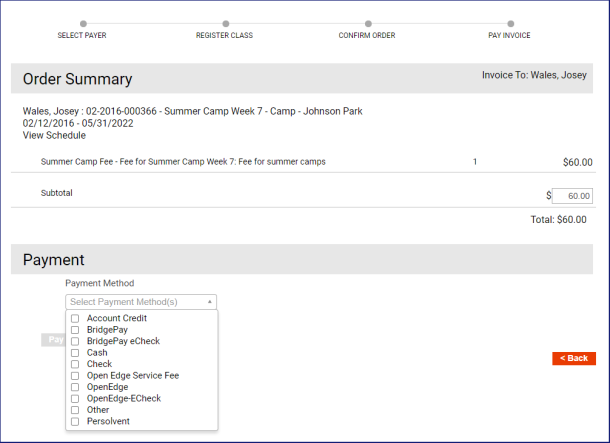
Select the payment methods that will be used in Cashiering. If cart fees have been applied to any of the selected methods, the cart fee line item displays:
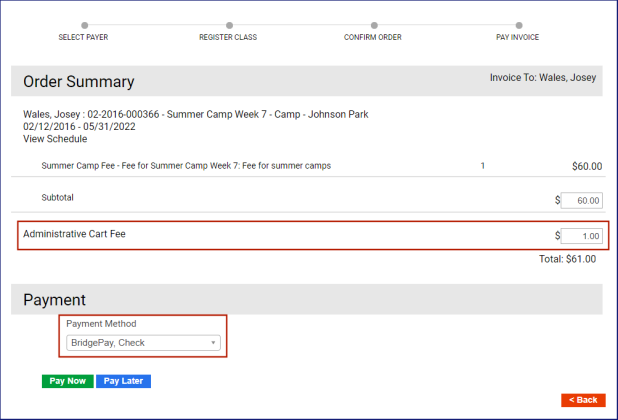
This feature applies to Order Summary and Payment pages and invoicing pages in the back office and on the citizen portal.
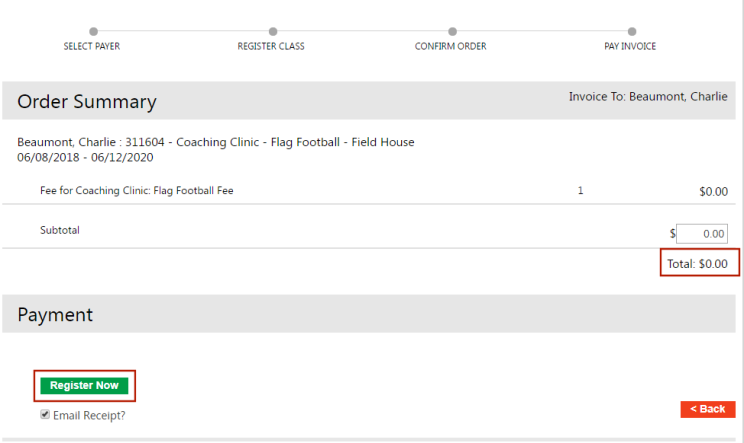
If a class is free, only the Register Now button is enabled in the Payment section.